
I have had a ton of people ask me how I get that beveled edge on my woodcrafts. It is no magical tool or method, I just sand it that way. I use my 12" disc sander.
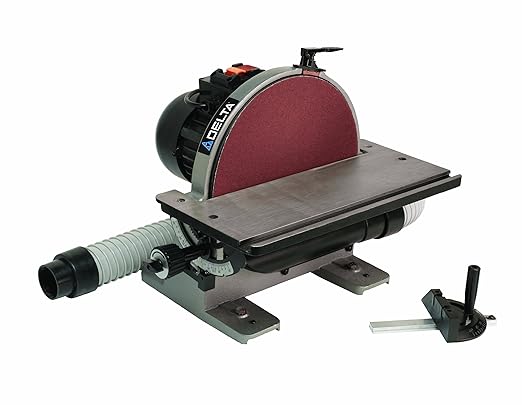
Mine is actually attached to my huge all-in-one machine, but you can buy one like this Delta 12" Disc Sander for less than $250 on Amazon.

***Excuse the mess. I work here...A LoT!***
This is my well used machine. I use it to sand every piece of wood that goes through my shop. Disc sanders are awesome. They make it possible to take off a huge amount of wood in just seconds. *BeWaRE!* They will also take off huge chunks of flesh or fingernails in seconds too. I have really had a couple blink-or-an-eye encounters with the disc sander when it was running that left me in pain for weeks.
Basically I buy 12" circles of sandpaper, 60-80 grit, from my local Rockler store for just under $10. I have purchased the ones off of Amazon and was NOT IMPRESSED, so now I only buy them from Rockler. A normal person could use one sandpaper disk for months or years. As long as I am not making fires {using a wood that tends to be more moist and sappy}, I can get away with 2-3 months of serious sanding before I need to replace it. The sandpaper disk is self-adhesive. You just peel the back off and stick it to the metal disk, push the on button, and away you go.

I also attach a vacuum hose below the disk to catch some of the sawdust. What you see all around is the sawdust not caught by the vacuum. You can see, every once in a while the hose gets nicked too. Anything that comes into contact with the disk sander ends up dust ;0}

I will try to show you my technique. Please be aware you must be a seasoned user of the disc sander before attempting to sculpt wood like I do!!! I don't want anyone to lose a hand or anything. This is very dangerous if you are not used to using a tool like this.

Turn on the disk and let it get up to speed. Hold your wood at an angle, press against the sanding disk, and pull towards you. The disk spins towards you and down. Never push the wood in the direction away from you. The spin of the wheel will push the wood back towards you and hard down on to the table.
Quite typically, when I am sanding down edges, I just touch the edge to the edge of the disk. It doesn't take long for the sander to bevel the edge off.

The zigzag I had to work with today was the perfect piece to show you. With the disk only running one direction, and the size of the disk, I need to work from two directions. First, I sand all the edges I can easily sand from the center of the sanding disk then towards the edge closest to where I am standing.

I go ahead and sand all parts that can be sanded like that. Notice that I can only get to half of the sandable edge. Now is the tricky, can-be-dangerous part.

I have to angle the wood so that I can reach the other edges.

I hold the wood upright and sand from the top side.
There are cases I cannot sand like this, like when the pieces are just too huge. Then I just do the best I can sanding the normal way and let the rest go.

The first side of the zigzag worked great! Now to do the other side.

Then on to harder things....like the whole bunny!
The bunny is a good example of a piece I just go with the flow and sand what I can. Around the ears and the feet I do try to sand from the other direction a tad, but when it is touch, I just improvise. That is the blessing of making rustic crafts. You can fudge it over and still LOVE what you get.
Here are a few things I have made using this sanding technique....

My embossing gun stand...


This Castle


That is how I sand my Ipad stands

This St. Patrick's Day decoration I made

Ignore my terrible picture here, but I used the sanding technique TONS to make these Christmas Decorations.

And these cute little candy corns!
Those are only a few projects from the last two years made using this technique. I have been sanding my corners for years! I have to get to bed, but feel free to cruise my Woodcraft labels to see more!
I am SO happy to tell you that we got our sewing machines all fixed and set up. The Sew*CakeMaker's have THrEe sewing machines in the house, and they are all set up and ready to run. I will be back tomorrow to show you the cute t-shirt remodel I did this weekend.
Have a great night!


No comments:
Post a Comment