Showing posts with label Cakes. Show all posts

Thursday, August 6, 2015

Groom's Dinner

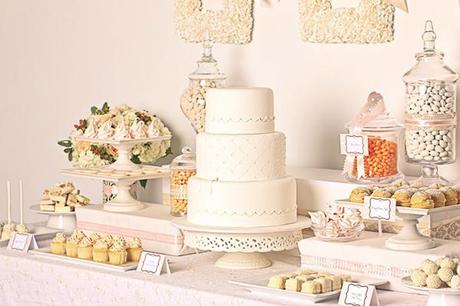
Here are a couple pics of the Grooms Dinner we had the night before the wedding.  
It was 90-something degrees, 110% humidity, so the cakes weren't the only things melting in the heat.

Even with the extreme heat, those cakes held together like champs and were lovely to serve to the bride and groom.

The reception hall my brother David and his bride Davie had signed with do not allow non-licensed bakers/caterers, so that meant I could not make his wedding cake.  Well, the Groom's Dinner was my way around that.  My baby brother would get his cake one way or another.  I made this groom's cake just for him.  I used all the same recipes used for his graduation cake, but made a whole lot more.

This sucker was HEAVY!  I had to have Scott carry it out to the table, and by some miracle, he didn't drop it.  After about 20 min in that heat and sun the cake started to droop a little, but a little slip of a plate under the one side and it managed to stand for the rest of the dinner...until we cut into it...and then it was gone ;0}

The cake topper I made with my silhouette and a cereal box and some black vinyl, and about 2.5 hours at 3am.  Details, details.

I forgot to get photos of the picture frame centerpieces, so look close at this picture until I can dig them out of the box to photograph ;0}  I painted the little peg people one night just for fun, the D&D was made for the bridal shower I still need to show you.  The whole "Nearly Weds" sign just had to happen.  How sweet is that.  I cut that out on my silhouette also.  You can get at the cut file HERE in my dropbox wedding file.

Madison and I decided to make this "naked" cake for our new family member Davie.  My new sister-in-law Davie is just so gorgeous this cake reminded us of her.  She is so pretty she doesn't need all the frosting to make her beautiful, she is just naturally sweet.

This cake was a french vanilla cake with a fresh berry white chocolate mousse filling.  Can I just say this was to die for?  Is that tooting my own horn?  I don't think it is because I did not invent these recipes, just made them come all together on this day.  Man!  I wish we had a slice left over.  Yumm.

The flowers Mads and I crystallized the roses by brushing them with egg whites and dusting them with sugar.  They were left to dry for 48 hours before we used them on the cake.


Davie's family put together this cute wet bar and had the dinner catered by none other than Famous Dave's.  Duhh?  Who else would you have cater a dinner in honor of the "Dave and Davie" bridal party?  These two kill me.  They are so energetic and SO in love with each other.  

Everyone had a great time visiting and eating before the big day.  And yes, I am glad it is all over.  So special, so much work!


For half of the tables I made these centerpieces.  I took the couple's engagement photos, had them printed onto transparencies, and floated them in glass blocks full of water.  They turned out stunning.

I forgot to get pictures of the candy bars we made too.  I guess I have some work to do still.

Tomorrow I go into the hospital for a small surgery, so hopefully I will be back in business soon.  Until then, stay cool and I hope you have a fabulous weekend!

Wednesday, July 8, 2015

How To Display...

Down to the wire now, I needed ideas to show our bride a couple different ways to display her fake cake and cheesecakes at the reception.  Guess what???  I didn't find any pictures online!

It appears people do one cake, or cheesecakes, or just giant buffets of all different cakes and desserts.  So, I guess I will have to walk through this one pic at a time.

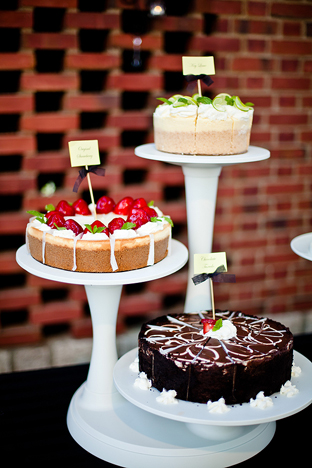
{source}   Available HERE from Wilton for $60

I love the look of this stand.  It is clean and simple.  I don't think it will work for us though because the cheesecakes are coming from Costco and are like 15-18" wide, all of them.  With this stand, the sizes get smaller as they go up.

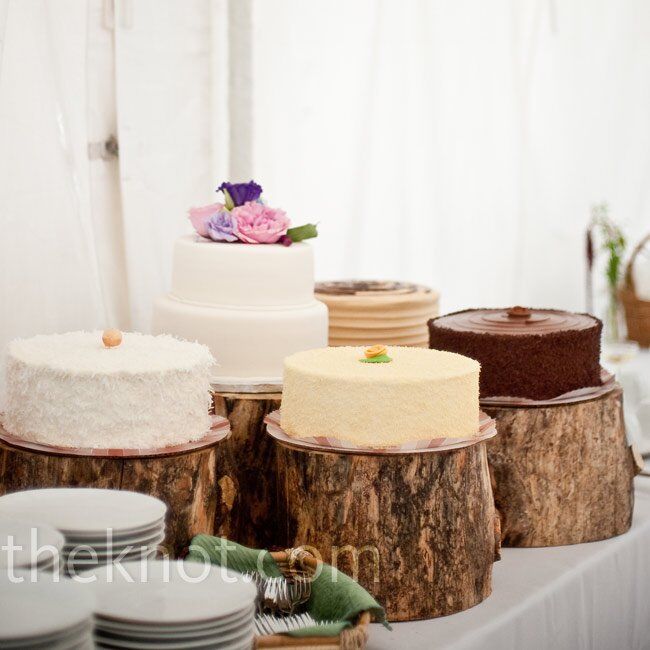
This one is cool.  It would work with cakes all the same size.  

I found it HERE for sale by Orson Gygi for $65.

0399cad0 dfd3 3585 8b85 2de842adb27a~rs 729
Stands like these, basically a cut log, can be purchased on Etsy, but if we went with these we would just make them.  Check out these other versions too...


Cupcake stands
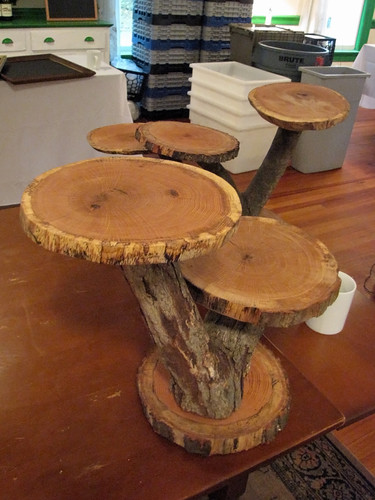
How crazy is that one!?! 
It would be an amazing presentation I am sure.  It would be tricky to make that and make sure it is totally balanced I think.  Scott, my hubs would be in charge of that part ;0}

These displays are exactly what I have been wanting for slices of cheesecake or cookies.  Priced reasonable too!
{Image source}  Available from Wilton HERE for around $30
This is a low cost option, again varying sizes, but I think we could just use larger plates and make it work...maybe.  I would have to see it in person first.

Floating Tiers Cake Stand

Around $50 from Amazon

I love these!  They are gorgeous.  Orson Gygi also has a huge selection of this type of stand.

{Source}  Found online for $89
This particular site sells them as a 4 stand set, so to do this photo you would need to buy 2.

So, now that we have looked at stands, here are some "buffet" displays I found that might work with our cheesecake/fake cake setup.  You may have to use your imagination though.  Just take whatever deserts that are there and imagine cheesecakes instead ;0}


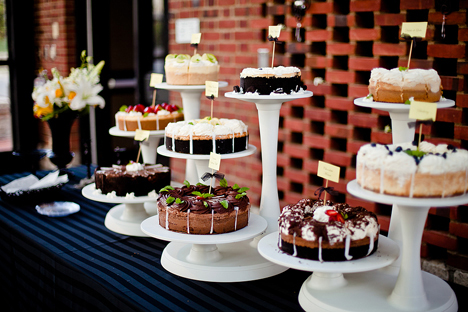
Beautiful!  A whole bunch of different crystal stands.  That would be perfect.

cake picture
I believe this display uses the clear acrylic stands.


I like the stair-step style of this display.  If I were them I would have done a square cake though, to go with all of the squares in the display.

Love the different heights.

Well, still undecided, but maybe one of these stands will catch my bride's eye.  If not, maybe it was a helpful collection for you.  More coming up on our wedding.  Less than 2 weeks and I will be able to show you what we decided ;0}

Wednesday, May 21, 2014

Peanut Butter Cup Perfection in a Cake

I offered to take a cake to my little brother's graduation party yesterday.  Knowing the boy has a love of peanut butter I thought a Chocolate Peanut Butter cake would be perfect for him.  While my torting precision was off just a tad, the combination of a few of my newly-favorite recipes were right on the mark!!!

2 cups white sugar
1 3/4 cups all-purpose flour
3/4 cup unsweetened cocoa powder
1 1/2 teaspoons baking powder
1 1/2 teaspoons baking soda
1 teaspoon salt
3 eggs
1 cup milk
1/2 cup vegetable oil
2 teaspoons vanilla extract
1 cup boiling water
DIRECTIONS:
1.Preheat oven to 350 degrees F (175 degrees C). Grease and flour two nine inch round pans.
2.In a large bowl, stir together the sugar, flour, cocoa, baking powder, baking soda and salt. Add the eggs, milk, oil and vanilla, mix for 2 minutes on medium speed of mixer. Stir in the boiling water last. Batter will be thin. Pour evenly into the prepared pans.
3.Bake 30 to 35 minutes in the preheated oven, until the cake tests done with a toothpick. Cool in the pans for 10 minutes, then remove to a wire rack to cool completely.

Out of utter laziness I copy and pasted that recipe.  I bless Shirlyo for her awesome submission of this recipe.  It is my most prized discovery, as of late.  The first two times I made this cake I did not use the full amount of cocoa powder.  The first time I only had just over 1/3 c. of cocoa powder, not quite 1/2 c., left in my container, but had already poured the other ingredients in the bowl, so I just went with it.  I also added an extra egg based on the reviews {already reflected in the recipe above-so only use three eggs ;0}  The cake turned out fabulously!!!  For David's cake I used the full amount and was surprised at how much more chocolaty it tasted, almost like a dark chocolate taste.  

So, here is my un-educated evaluation...if you are a milk chocolate fan, use 1/3-1/2 c. of cocoa, but if you like a dark chocolate, use the full amount, 3/4 c. or go wild and go for 1 full cup!  Sounds dangerous.

Hot Fudge- 
use as a filling or topping
1 can sweetened condensed milk
1 stick {1/2 c.} butter
1 c. chocolate chips

Throw all ingredients in a saucepan and heat over medium heat until melted.  Do not allow to boil.  Store in airtight container in the refrigerator.  Feel free to use any variety of chocolate chips- mint, cherry, peanut butter, butterscotch, cinnamon, white chocolate.  The recipe works with them all!!!

Peanut Butter Filling
 {like a peanut butter cup, but better!!!}
2 c. powdered sugar
1 1/2 c. graham cracker crumbs
1/4 c. butter, room temperature
2 c. peanut butter
A pinch of salt

Mix everything together and thin with milk until at the desired consistency.  I add the milk to get it a little more fluid than a peanut butter cup when using this recipe for cake filling.  You don't want it dry or it will dry out your cake.  I would probably start with 1/2c. milk.  I just pour straight from the carton, but using a measuring cup would probably be a good idea if you are not as random a person as I am ;0}

This is also my recipe for peanut butter bars, with only a couple tablespoons of milk instead of the 1/2 c.   You press it into a pan and cover with melted chocolate chips.  It is also the recipe I use for buckeye balls during the holidays.  I roll the peanut butter mixture into 1" balls and dip in melting chocolate.  Yumm!  

Peanut Butter Buttercream Frosting
1/2 c. unsalted butter, room temperature
1/2 c. creamy peanut butter1 tsp. vanilla
3 c. powdered sugar
milk, to reach desired consistency

Cream together butter, peanut butter and vanilla until light and fluffy.  Gradually add the powdered sugar, one cup at a time until combined.  Add enough milk to reach an easy spreading consistency.


I got this recipe from Eat Cake For Dinner, from her Peanut Butter Cookie recipe.  I love the whole recipe, by the way, but have a couple adjustments for the cookie part.  I guess I might as well post that recipe with my adjustments too ;0}

Frosted Peanut Butter Cookies {adapted}
{Not your normal PB cookies!}
1 c. unsalted butter, room temperature
1 c. brown sugar
1 c. sugar
1 tsp. salt
1/2 tsp. baking powder
1/2 tsp. baking soda
1 tsp. vanilla
2 eggs
2 3/4 c. flour
1 (12 oz.) bag Reeses Peanut Butter chips (No substitutes)

Preheat oven to 350 degrees and place rack in center of oven.  Cream together butter, brown sugar, sugar, salt, baking powder and baking soda.  Add the vanilla and eggs and mix well.  Add the flour and peanut butter chips.  Mix just until flour and chips are blended together.  Using a cookie scoop, scoop dough into 2-inch balls and place on a parchment lined cookie sheet.  Bake for 12-13 minutes or until set.  Cool completely and frost with peanut butter frosting.    

For this particular cake, I used a big old sheet cake sized pan, something like 19x13" pan of the professional variety.  With that large of a pan, I doubled all of the recipes {we ended up with about 1/2 of the pb filling left over}.

The cake baked in about 45 min.  As we were working with a time restraint we didn't let the cake cool in the pan more than a minute or two, then dumped it out on a cooling rack for about 15 min.  Due to my usual disorganized state {I blame this house for not having any storage space anywhere near the kitchen} I could not locate the wise spot I decided to store my cake leveler and had to use a knife to cut the cake in half making a bottom and top layer.  We, meaning me and my fabulous 16 year old daughter Madison, slid the top half of the cake onto a flat cookie sheet, and then to a cooling rack, and let the two cake layers have another 5 minutes to cool.  We spread a layer of the fudge on top of the bottom layer, then dropped the pb filling on top of the fudge in clumps and smoothed it out, patting it down to evenly cover the whole cake layer.  The top layer of cake was slid back on top, and then the top was covered in fudge sauce.  We took care to not use too much fudge sauce that it rolled over the sides of the cake.  

The sides were frosted with the pb frosting, then chopped peanut butter cups were pressed into the frosting.  I added a top and bottom border of icing using the peanut butter frosting and a #21 star icing tip.  I piped writing on the top of the cake while we drove the hour up to the party.  

Isn't he handsome!!!  David won the rights to an amazing job with General Mills and will start that shortly now that he has completed his MBA.  We are all so proud of you Dave!!!  And I can't wait to get started helping with the wedding prep either.

Friday, September 27, 2013

Wedding Cake

Hello!!!  I am finally back :0}  
The wedding was a total success and I managed to get out of there without ruining my mascara!  

I made it through the ceremony fine cause I was too worried about the cake to really think about my baby brother getting married.  After that I thought I was scotch free from tears until I caught sight of the slide show of so many baby pictures.  I am six years older than my little brother, and while I am not sure he remembers me taking care of him, I remember watching over him like he was my own little guy.  The slide show was just a primer though for the mother-son dance where the real waterworks began.

It finally dawned on me that the little guy, the one I played with in the wading pool and the kindergartner I dressed before school, the nerdy little book worm that always made me laugh with his crazy dry humor, that little kid was gone.  In his place was a grown man, pledging the rest of his life to the first girl I have ever seen him truly googly-eyed over.  

What a sweet day.

I was super excited to make their wedding cake...or should I say wedding cakes.

I made one three tiered wedding cake, frosted with fondant and decorated with fondant flowers and bridal lace.  But before that...

I spent an entire week baking and frosting 250 mini-three-tiered wedding cakes.  In all honestly, I didn't really think I could do it :0}  I was determined to die trying though.  The individual wedding cakes were pretty important to the bride, my new sister-in-law {LOvE IT!} so I just kept telling myself we HAD to make it happen.  

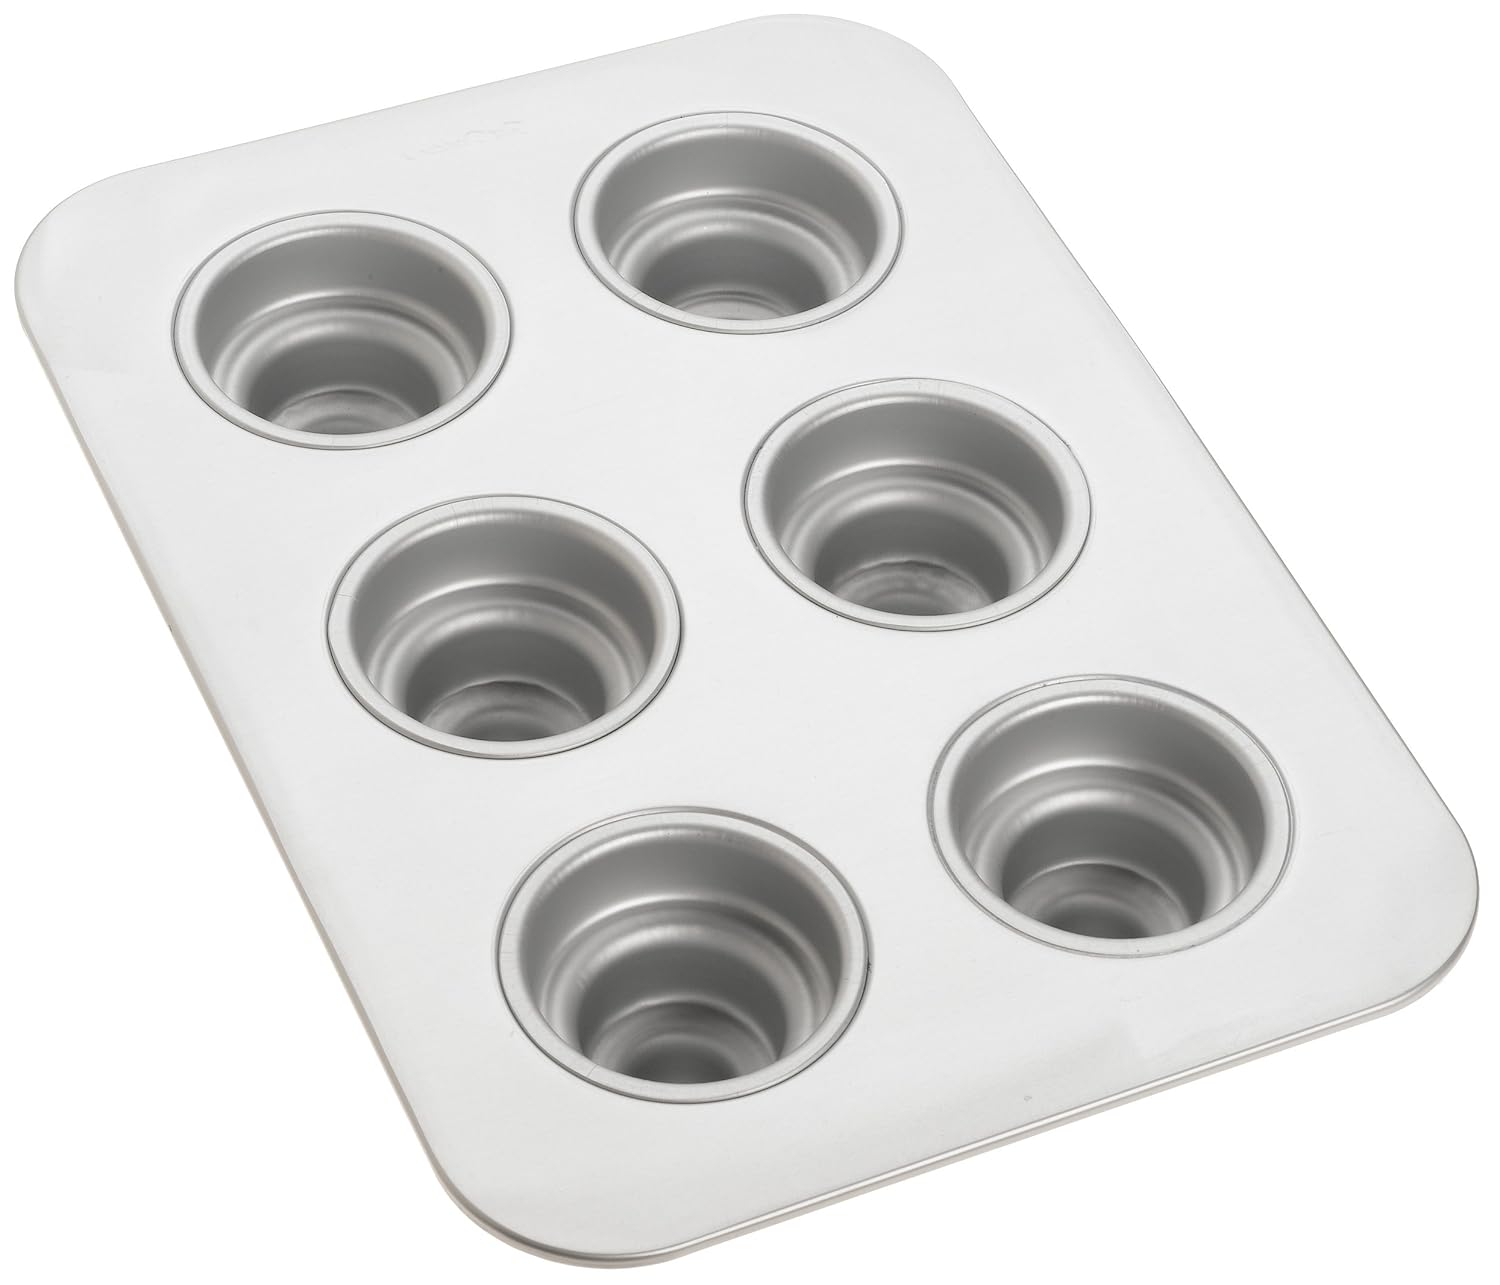
I purchased Fat Daddio's 6-Cup Individual 3 Tier cake pans on Amazon for $24 each.  At first I just bought one to make sure it would work and the cakes would come out OK, and then I went back and ordered three more.  In all honesty, with 250+ cakes to make, I wish I had ordered 6!  

One cake mix made about 14 cakes.  I baked two pans at a time in the oven using my altered cake mix recipe and baking the cakes for 25 minutes at 325.  Over two days I think I made about 25 batches of 12 cakes, each baking for almost a half hour.  It literally drove me crazy.  Luckily a friend dropped by for about two hours and babysat the cake process so I could get a break and get some last minute wood cut, otherwise I don't know if I would have made it.

I made a french vanilla cake with raspberry filling, an almond cake with almond cream filling, and a chocolate cake with chocolate ganache topping.

To fill the mini cakes, I just cut the bottom tier off, smeared on a Tablespoon or two of filling and replaced the removed portion of cake.  It worked like a charm.

Backing up to the baking portion again, it was torture.  If I could deter you from making any more than 12 of these darling little cakes I so would.  If you are crazy like me and decide you really must make these wedding cakes for all of your guests...first, tell yourself no...and if that doesn't work, email me.  I will try to talk you out of it :0}  Lastly, get ready for some labor.  

With each batch, I would grease the pans {more on that later}, mix the batter, fill the pans, put them in the oven, take the finished set of cakes out of the other set of pans, cut any excess cake bump off the bottom so they would sit flat, dump them on a cooling rack, wash each and every tier of the three tier cake pans for every cake spot, then dry each and every layer, then grease each and every layer, then transfer the baked cakes to boxes for storage, and then fill the next set of cake pans and start all over again.  I think typically I had about three minutes between batches to sit while I waited for the timer to go off and getting up to start all over again.  NOT FUN!

The next hurtle was frosting them.   I managed to round up three unsuspecting friends to come help frost as well as four family members to come intermittently through the first day of frosting.  We managed to get two flavors frosted in the first 12 hour day of frosting and filling.  The second day was just as long.  MORE TORTURE!  I made the vanilla and raspberry cake with squarish swirls, then pushed some edible pearls into the centers of the swirl to make it look fancy.  The almond cake was frosted in a messy style with a whipped frosting {delicious!}, and by the time I got around to the chocolate cakes I was totally tired of frosting!  Finally after a few failed attempts at different designs, I threw the towel in and ran to the store for the ganache ingredients.  

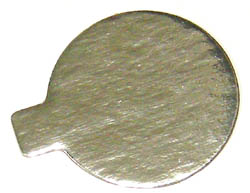
Mono-Board Silver, 3-1/4 Round with Tab, Box of 500 Pieces
We put the cakes on cardboard cake circles {ordered from HERE-the only place I could find them...make sure to get the circles with the tabs!!!}  You just put a dab of frosting on the cake board, then put your cake on top.  The frosting keeps the cake from sliding around during transport or while plating the cakes.  VERY IMPORTANT the frosting is.

I think I have stayed up a little too late tonight getting these pictures on here, so I am certain I am leaving out important information.  Just be sure to comment below or email me if you have any questions.  I would be glad to share anything I know if it will help you out.

Oh yeah!  Frosting!  I bought some five gallon buckets of frosting from Sam's Club.  I have been told that Costco will sell theirs, but I haven't found a Costco that would sell it to me.  I bought a bucket of butter cream frosting and got about 100 mini-cakes filled and frosted {by piping on the frosting}.  

That was my other point, don't try to frost these babies smooth.  My first test run of frosting 12 took about 2 hours to get the frosting smooth on all the layers of all the cakes like I would a big cake.  If I get a little time in the next week I will show you close up the best ways I found to frost these mini cakes.

Anyway, no matter how much work the cakes were, I would do it all again for these two!  I love them both completely.  Little Brother did a great job picking a wife.

Can I tell you how it warms my heart to see my little brother with such a happy grin on his face.  Seriously.  Great.  There go the water works again!  
I will be back soon with more wedding pics.
Have a great weekend :0}

Friday, November 2, 2012

Just a Little Something

We were at church on Sunday and my husband heard that a poor little couple was getting married Friday {today} and were going to have a little church wedding.  They didn't have any money for a reception or anything, but were just going to tie the knot anyway.  

Let the record show that it was NOT ME that freely volunteered my services to make a cake.  My baking skills were going to be happily hidden during our whole stay in South Dakota!
However, when my husband asked if I would make a small cake for them, I just couldn't resist.  Remember, I have only had an oven for a month.  It is like learning to walk again.  While unpacking all my cake decorating stuff I did wonder if I would ever touch it again.  
I guess I got my answer.  
I really wanted to give the whole ruffled cake thing a try.  

Since we don't have two pennies to rub together ourselves, I didn't even have a fiver to run to the store and buy fresh flowers for up on top.  Finally I just made a couple extra ruffles and gathered them together to make a carnation-y topper.  To add a little snazz I brushed on some gold luster dust.
It looked so cool, I decided to give the whole thing a little dusting.

That luster dust REALLY made the whole cake.  It brought definition to all the ruffly layers and made the cake more elegant, like a wedding cake should be.


I have to admit, it was really fun to make this cake!
I have missed baking soooo much...just not the dishes ;0)


Novelty Print Quilt Pattern

I have had a hard time finding good quilt patterns for novelty prints the past couple times I purchased them.  I made up this pattern so tha...