Showing posts with label Fathers Day. Show all posts

Thursday, July 30, 2020

Novelty Print Quilt Pattern


I have had a hard time finding good quilt patterns for novelty prints the past couple times I purchased them.  I made up this pattern so that I could show off the novelty, but still keep the quilt simple to finish.


Here is my pattern sheet I made myself just in case anyone wants it.


I designed these "U" squares and sewed them together first.  They were relatively easy compared to many quilt squares out there.  Aaaaanndd...that is the only photo I took during the construction phase apparently.  So, on to the finished product!


I used a 90x90" black microfiber blanket for the back as a replacement for minky since I didn't buy enough from the fabric store months ago.  Being in this quarantine has made purchasing fabric inconvenient, expensive, and in some cases, impossible.  I purchased the blanket on Amazon for about $26 and cut off the hemmed edges before putting it up on the quilter.  When using these blankets, plus batting, the blanket is THICK.  It ended up about 6 lbs, so good for those loving a little weight to their blanket.  I still prefer actual minky for the blankets, but they work in a pinch.


 Choosing the thread was rough.  The minky was black, but the front of the quilt was about 50%/50% black and white.  Actually, I just realized I could have used Red, lol.  I don't profess to have a fully functioning brain....ever.  In the end, I chose to quilt with black on top and bottom.   I kept the pattern loose to keep the quilt soft.  Tighter quilting designs make for a stiff quilt.  Also, my quilting set-up is pretty touch and go, so really I always quilt with this free-motion pattern, lol.  One day we will upgrade the machine and table, but not today.


And here we go, all done!  I didn't want the work of adding the black strips between blocks in the beginning, but it really sets everything apart and shows off those novelty prints.  I couldn't have been more pleased with the finished product.


So, Happy Birthday Dad.  I hope you loved your quilt!

Now on to the next project!
Between Etsy orders I have been designing shelves for our little sets of nerdy toys, lol.  More on that later!  Have a great night ;0}


Thursday, July 16, 2020

Quilten' For My Man


Here it is!  The quilt I whipped up for my hubby for Father's Day ;0}

I happened across a going-out-of-business sale at one of my favorite quilt stores last summer and scored the quilt kit for a fabulous deal.  I have been pulling this kit out of my UFO pile for small snips of time ever since then, cutting, looking for the pattern in our moving boxes since it was accidentally packed from September 2019-February 2020.  Finally found it, did a happy dance, then waited patiently until it's turn finally came.


It is a pretty simple pattern, only 4 log cabin style blocks.  The biggest recommendation I have for this type of quilt is be sure to square up your blocks all along the way.  When I went to quilt this gorgeous thing the inner part of the "cabin" was a little baggy.  That could have been avoided with a little more consistent squaring up.


Ignore my messy desk.  It always looks that way but you are not supposed to see that.  


I managed to finish sewing the top, but was not able to quilt it by Father's Day.  I did, however, quilt it the Monday after Father's Day and hubs came home to his very own quilt...
and then had to be my quilt model so I could show you pictures.
He is so sweet.  How does he put up with me!!!


Isn't he cute!  I sure love that guy.
It is a good thing he is very tall, because the quilt was VERY TALL.  
Actually it was the other way around...
I had to add an additional boarder because I wanted it to go just under his chin and travel all the way to wrap under his manly feet at night.


There it is!  What a rewarding project!
It did take more time than I thought, but could totally be stitched together at a nice weekend quilting retreat with a little pre-cutting.

Be sure to label all the pieces!!!  
I use post-it notes and label each strip and it was still just a little confusing to follow.  


The shop I bought the quilt kit from was Elaine's Quilt shop.  I believe this particular quilt, using these colors and this arrangement of the 4 blocks, was their addition to the pattern.  They are now part of My Sister's Quilts in Sandy, UT.


Typically these days I use minky on the back of any quilt I can possibly afford to, but my hubby wanted a summer quilt just light enough to keep the air conditioning off his skin.  Instead I used a king-sized top sheet that is heavenly soft to keep him comfy at night.

Now hubby is properly dressed in a sharp looking manly quilt
 every night for his travels to dreamland.  He is worth every stitch!


Tuesday, June 23, 2015

Dad's Can Be So Marvel-ous

There are lucky kids out there in the world that have a Super Hero for a Dad.  My kids fall into that category.  My hubs was the inspiration for this Father's Day block set.  It was half his ability to walk in the door and pick up the pieces of our broken day, half his unmeasurable love of all things nerdy, Marvel characters included.

I knew I wanted some super hero symbols thrown about, along with some word bubbles and the Pow and Bam's.  I was about to put something about heros on the big block when I realized I could word-smith Marvel's logo into the whole design.  Then the "You Are Marvel-ous" turned into "You "R" Marvel-ous."  Yep.  This was just fun to play around with.  The blue city scapes are part of the paper pack I used, purchased from Micheals.  All the letters and hero symbols were made out of vinyl.


I decided to just have these two just hangen around.  They are not attached in any way.  The dowels are not glued in, making them removable and easier to store.


The back of these blocks are already mod podged with paper.  If I get through all the wedding projects I am working on this week I will get on a 4th of July set.  I am so excited!  Things have been so crazy for so long it seems like forever since I got to just play with wood and paper.

I don't know if anyone else is crazy enough to make this set, but I can tell you, I just cut a bunch of 4, 5, and 6" blocks out of 2x4's to play with.  The blue board is a 2x3" cut just as long as three blocks are wide...I think it was 10.5".  The bottom board was cut 1 inch longer than the measurement of 5 blocks.  I say it that way because I get 2x4's that are different widths all the time, varying almost 1/2".  Measure yours from side to side {should be around 3.5" wide} and multiply that by 3 and 5.

Anyway, you can get the silhouette cut files HERE too if you want them.  
The word bubbles and the Pow/Bam shapes should be in the silhouette files.  I used the silhouette to cut them out, then traced them onto 1/2" mdf.  Don't have a scroll saw???  Just cut those out of thick cardstock or chipboard and just hot glue them to the dowels.

Happy Summer!  Now to get working on those 4th of July blocks.  Knowing me, I will finish them an hour after the fireworks show ;0}

Wednesday, May 20, 2015

Our Dad's A Nut

Trying some new frames out now that I have my awesome palm router!!!  How about a nut?

When finished it would look something like this...
Yep.  Our dad's a nut.  I wasn't sure how to make a peanut that looked like not-poop and an acorn was a little out of season.  What better to be a symbol of Dad's Nuttyness than a Manly tool-style nut!

So the next question is, should I make it a set of two, cut out a bolt that says,
 "Thanks for not "Bolting"???"

Wahahahah!  I need to get out more.


Wednesday, June 11, 2014

Happy Father's Day!

 
I dressed up my little tie prop and got a hanger on the back just in time for the week of Father's Day.  

I usually use it in pictures, but ORIGINALLY I made it to be used as a door decor.

We had to spice it up a little though.  That is why I added the green to the bead board stripes.  

It's nothen' special, but so spunky and fun to get us in the mood for celebrating Dad!

Give your dad a squeeze!

Wednesday, June 19, 2013

"Yoda" Best Dad Gift Basket

I promised to show you my Yoda gift basket I made for Hubby.  He was the proud recipient of the "Yoda" Best Dad Ever" printable from last week.
Still a little broke after our move, I was going to take the cheep way out and just give Dad his OWN Star Wars movies with a popcorn and toppings and call it good.  I figured my efforts could be spend on the gift bag.

I didn't get to work on it until Saturday night, but it came together well.  I just looked at a picture of Yoda and turned a yard of felt into this pile of pieces.  I can't draw a stick figure, but give me a pair of scissors and magic things happen ;0}

Originally, I planned to make a simple felt bag that fit over a dollar store plastic bucket.  I was going to grab some cellophane to make it a gift basket, but when I stepped up to the cutting counter at Joanns to buy the felt, this bolt of green/yellow tulle was sitting there calling my name.  It looked pretty good with the pukey green felt, so I grabbed 1 1/4yds of the tulle for the top half of the gift basket.  

I just pre-ruffled it, then sewed myself a Yoda sandwich.  A nice over-achieving wife would have hand stitched each piece of Yoda's face, lovingly thinking about all the sweet, thoughtful moments her husband had spent in selfless service of his family.  Me, I hot glued the face together, stitched the hair and bottom circle to the thing, and thanked heaven that no one bothered me long enough to complete the bag.

Real life.

Later we went to Target to grab a couple things.  The kids suckered me into buying Dad...
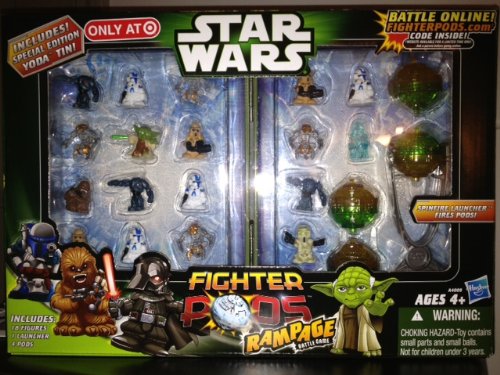
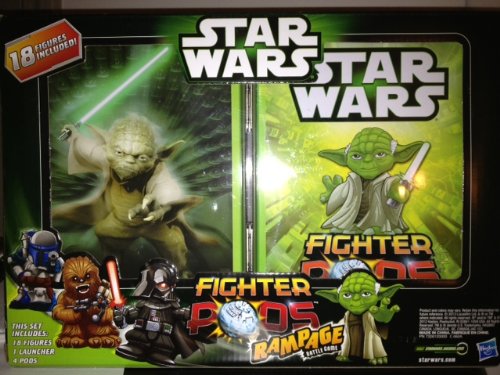
THIS toy.  No need to worry.  We didn't JUST give Dad his own Star Wars movies :0)  Dad is always a fan of new nerd toys!

Here is Yoda with his ears sewn on.  I have a house full of company tonight, but I will try and get the pattern made up for you so you too can be proud owners of a Yoda head gift basket!!!

If you are lucky, you too can keep it next to your kitchen table for a week and keep thinking that Yoda really is eating dinner with the family ;0)

Nerd Crafts Forever!!!


Tuesday, June 4, 2013

Yoda Best DAD!

I made the first part of our Father's Day gift to Dad this year!  
We were walking through Walmart and I saw a Yoda pillow on a shelf.  That was when I had the phrase
"Yoda" Best Dad Ever!
pop into my head.  

Being a huge Star Wars fans, we decided a Star Wars movie night would be our gift to him and the perfect gift to accompany my little play on words.  

I worked up a couple printables just in case anyone else wants them.  I plan to put together a popcorn bowl complete with bowl, pop corn, various toppings, and maybe those cute popcorn containers from the dollar store.  I will have pictures of the completed project, but for now, you can download any of the prints HERE with dropbox.

I have these cards sized for 4x6 photos...


and two like this to be printed up on an 8.5x11" piece of cardstock for a folded card.

Hope you like 'em!  I am pretty sure Dad will ;0]


Novelty Print Quilt Pattern

I have had a hard time finding good quilt patterns for novelty prints the past couple times I purchased them.  I made up this pattern so tha...