Monday, November 25, 2013

Thoughts on Thanksgiving


Don't think I am going to go deep on my thoughtful feelings about the holiday here.  I do that in the shower or when I am supposed to be working or something, not here on the blog :0} 

No, this is all about what to do to decorate for Thanksgiving!!!
Yep, I am that shallow.

Anyway, I wanted to do a little to decorate for our big family dinner.  We don't really do anything for decorations usually.  Since this is the second year in a row getting to be at the big family dinner since we moved back to the midwest, I think the fam is ready for some crafty craziness.  Don't you?

So here we go.  The first area of contemplation is a centerpiece for the big adult table.

Centerpieces

First I must consider my own pilgrim ship I made a couple years back.  We lost a mast or two in the recent moving spree, but it could be easily repaired.  Hmmmm...  I did make these matching place cards...
I just don't think I have time to make 20 new ones.

OK, how about some other centerpieces I loved...
thanksgiving-table-decor
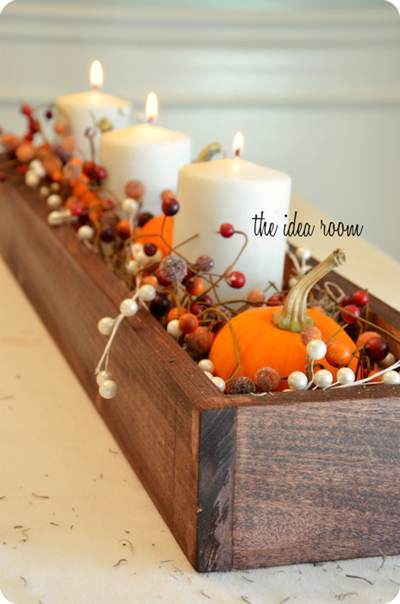
I am loving the whole wooden box thing lately.  Might have to whip up one of those.
DIY Here with TheIdeaRoom

Beautiful from InspriationForTheHome

Log Centerpiece that takes minutes to create and can be used for so many holidays & occasions!  Designed by @Jenna_Burger of www.sasinteriors.net
I still have tons of logs left from the wedding collection of 2013.  I could totally do this, although, you should know that those holes are pretty tough to drill.  The post says it is a 5 minute centerpiece, but you will need much more than 5 minutes to drill those holes :0}  Love it all the same!

Love this!!!  Don't know where in the world I would find the candles, but I love them.  

Fall (Halloween, Thanksgiving) / Pinecones in the vase....
I also really like this tall vasey look.  The only problem is these centerpieces can make looking at each other rather difficult, but that could be a good thing :0}

Next category...
PlaceCards or Place Markers

I do love the idea of ships!  These are adorable, but I think I would make them out of wood.  Simpler versions of the ones above.  

Teehee.  These little pilgrim shoes are cute too.  Made from paper you could get the kids to help make these.

While we are getting the kids to help, these ones would be fun too.  Little tee pees made out of craft foam.  

Want something more organic, how about a simple pinecone with a name card in it.  

The Wood Connection: Thanksgiving
I have to admit that this little guy is one of my favorites.  I searched all over the blog, but couldn't find the post containing the turkey, so HERE is a link to the pinterest pin.

vintage silver forks place card holder
I am AWFULLY tempted to try out these fork place cards though.  Wouldn't they be fun!  

Next up, 
Placemats!

cute placemats for kids table
These Kids Placemats from Pottery Barn are adorable!!!!  Way out of the budget and it is to late to order even if I were totally nuts anyway.  But, they are still worthy of posting.

Here is an entourage of printable kids placemats:

Kids Thanksgiving Placemat

Thanksgiving Placemat Craft pattern - girls


Um, I should mention, you need to look at this link.  Besides the placemat above, there are TONS of cute printables to download too!!!
IMG_3128.JPG
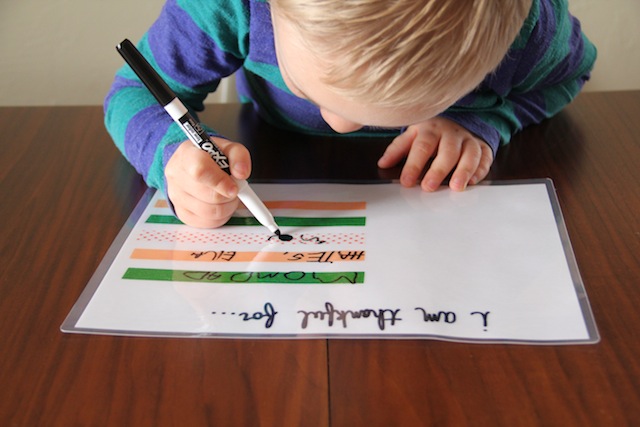
Dry Erase Placemat HERE

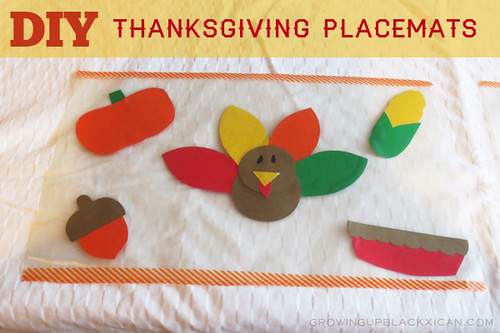
diy thanksgiving placemats
Kids can make placemats like the ones HERE using clear contact paper.  

You KNOW I am a big fan of using my Silhouette.  Well, this whole project is made with the Silhouette.  You use the sketch pens to make the placemat, and then the other files included to make the little turkey crayon holder.  LOVE IT!!!

Another great post full of adorable Thanksgiving printables, including THIS placemat.
thanksgiving thankful placemats, crafts, seasonal holiday d cor, thanksgiving decorations, The Thanksgiving Thankful place mats on my entire Thanksgiving tablescape tutorials for the the items available
These Burlap placemats are so cute!  I love the weave at the bottom.

You should know too that Target had three or four different versions of kids Thanksgiving placemats in their dollar section.  I think you got 8 or 12 for $1.  That would be cheaper than printing them.  Check that out if you are in the store in the next couple days.

Hmmm...cutting scrapbook paper into the shape of that back plate and using it for the placemat...
I know that white bit there is actually a plate, but wouldn't it be cute to cut white scrapbook paper into that shape and use it as a placemat???  12x12 would probably work, right?  Again, sorry.  No viable link, just a link back to Pinterest.

Now for 
Napkin Rings 
 {which could also double as place cards}

Creating  a pretty bow around the napkin ring

thanksgiving napkin rings  I like the acorns


DIY Napkin Rings


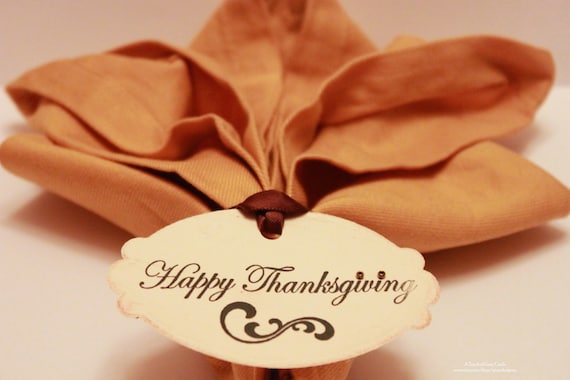
Thanksgiving Tags (Double Layered) - Vintage Inspired Thanksgiving Tags - Thanksgiving Napkin Tags - Thanksgiving Napkin Rings (Set of 8)

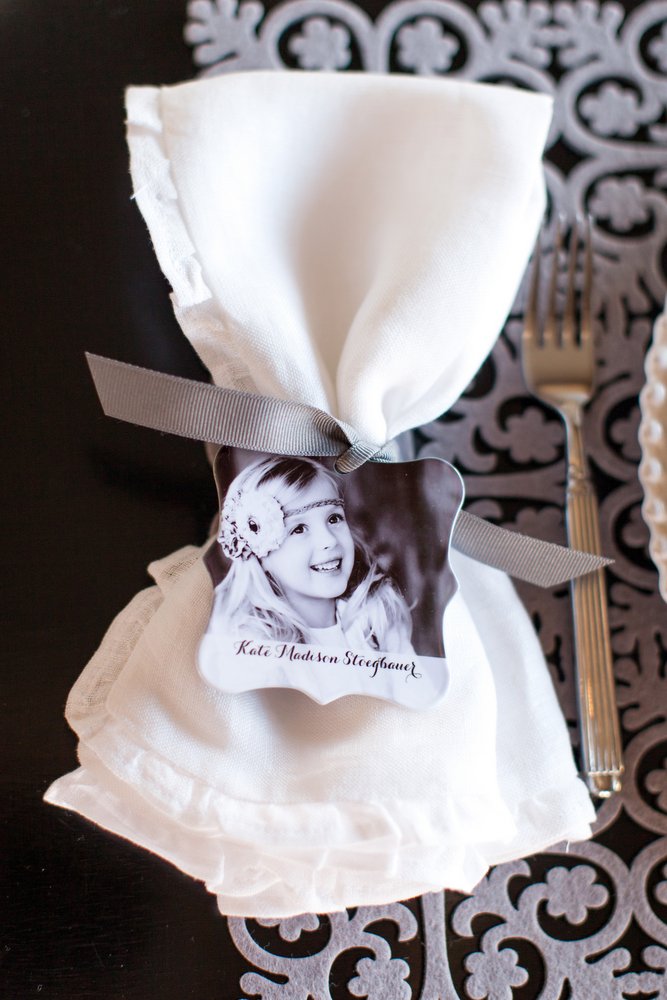
shutterfly_thanks_0016

Pilgrim Napkin Rings

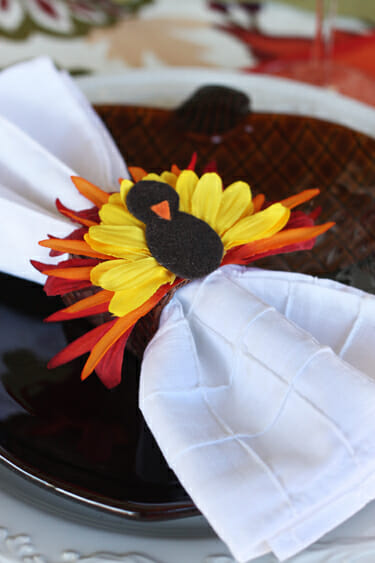
thanksgiving turkey napkin ring  & placecard holder


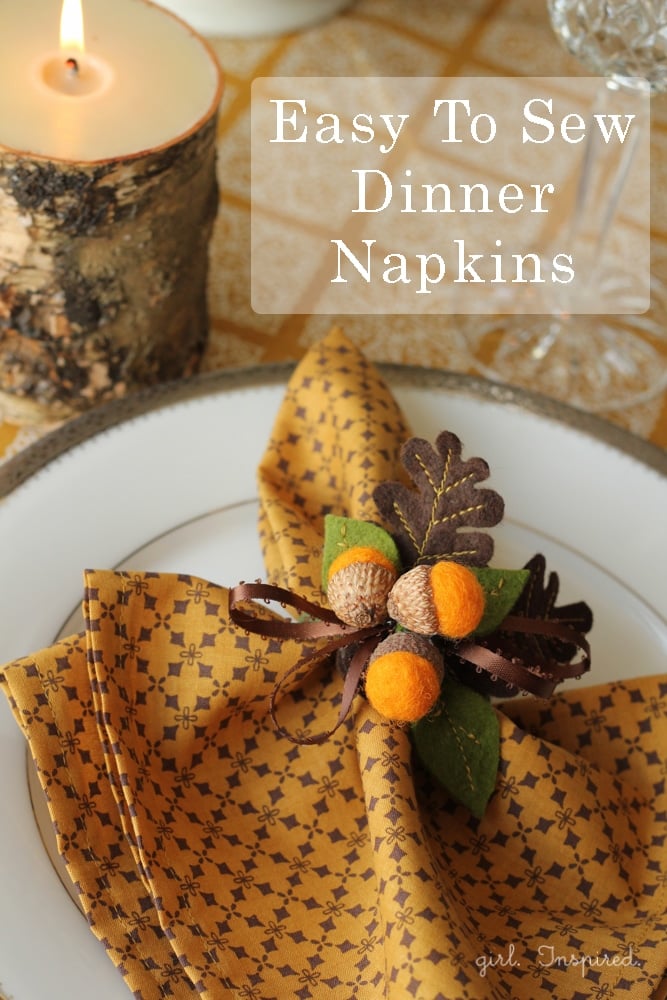
How to Sew Dinner Napkins

FallNapkinRings8-SondraLynatHome


I think that is enough for one day.  I still want to figure out a couple crafts for the kids and maybe a treat for each placesetting, but for now, I gotta go.  Things are piling up all around me.  I do love this table runner though...
farm inspiration | lace details
I better put that on the list.  That and this Jar...
I think for the family dinner though, Emmalee had a good idea.  We can put each person's name in the jar and draw one out through the evening.  When your name is called you have to stand up and say something you are thankful for.  Sounds good to me!


Glue Gun Stand Addition!

My customers requested it, I made it happen.

They wanted a Glue Gun Stand that came with a cup for glue sticks attached.

Done.  What else you got???

We tried a couple things, but this bracket and jelly jar seemed to work the best.  


I am thinking I will have to make a Left or Right hand option when I get these bad boys listed on Etsy.  Being a Leftie I am a little over conscious about that issue ;0}

Want one for Christmas!?!  Just email or stop by my Etsy store to pick one up.  Sadly, the shipping on these is more than I like.  I still can't find a way to ship wood any cheaper than the post office.  It makes me angry that if this guy were a book he would ship for $3, but since he isn't, it is more like $8.  LAME!  Maybe I will have to start making them out of books :0}

Sunday, November 24, 2013

How to Fix A Goof!

Well, lucky me, while trying to show you how to apply transfer tape to vinyl, I happened to make some pretty nice bubbles!  While it doesn't happen too often any more, it can be really nice to have some support when stressful little air pockets arise like these ones :0}

Well, here is what my roll looks like when I have a bunch of sheets all rolled up on transfer tape waiting to be cut into strips.

Emmalee wanted her hand in the picture so everyone could see her on the blog :0}

I just chomp along down the line, cutting the sheets apart into nice mailable 2x3 nativity pieces.  

It is quite rewarding to have a nice little stack like this at the end of your work session.

Slightly less thrilling is having a couple rows with huge lines of tape not meeting the vinyl paper.  Ugh!

How do these goofs happen???  Well, typically it happens when you are placing that first edge of vinyl paper to transfer tape.  If the edge of the vinyl paper is not pulled taut, or my favorite, when the top of your vinyl sheet hits the transfer tape before you were planning cause you are still trying to line up that bottom edge.  Don't worry.  You will discover soon enough what I am talking about.  My only object with this blog post is to talk you through fixing the problem and getting on your merry way.

Here is one nice little bubble.  No crying.  Its OK.  It is simple enough to fix. 

Because the bubble was simply between vinyl designs, you can just lift the transfer tape from the backing paper until you have passed the bubbled area, then lay the tape back down.  

Bam!  
Bubble gone.

Now, this guy is what you call a compound bubble.  Not my friend.  Not anyone's friend!

First we will address that big bubble.
It runs just about the whole length of the sheet.  No tears for this one either.  Just do like I showed you before and lift the transfer paper and put it back down.  Whew.  Got that one.  However, there is still another bubble.  This one is bad.  This one is in the actual vinyl design.

See it!  It is that white spot there.  My first thought would be to try and push it out to the white area where there is no vinyl.  It has worked before.  If this were a thicker...no...if this were a hardier design, I might try it, but these nativity stables are not super accommodating.  

Let me show you what I do to fix this.

First, I like to limit the work area.  I cut ever-so-lightly into the transfer tape to cut just that section from the row.  There are perfectly adhered vinyl pieces above and below this one.  There is no sense in involving them in this mess.  With a smooth slice above and below this nativity, I can avoid causing further chaos.

OK, if you wanna cry a bit before doing this, now is the time.  Once we start with the scalpel, we won't want to take a break to grab tissues or anything ;0}

I have done this several times.  It really does work.  Take your exacto knife {another reason you want to use an exacto instead of the picker tool}.  We are going to lift the shortest part of the design {from the bubble to the edge} off of the transfer tape.  That involves working this blade, dull side facing the direction you are moving, from the bubble to the edge.  Remember that vinyl does stretch.  Work slowly.  Lock the children in their bedrooms before you start :0}  You don't want to be interrupted while you do this.  Shimmy that knife and eventually you will make it to the edge.  In most cases you will not have to touch the vinyl, it will just fall back in place like the transfer tape did above.  You will want to keep the vinyl edge well above the transfer tape and reattach the vinyl to the tape from the bubble site back out.  

Use your finger to rub that design to the transfer tape.  YES!  We did it!

Bam! 
 All Better.  

Got that stack finished. 
 Woot!  Woot!

Now, every so often in SewCakeMaker land we suffer a much more heinous bubble incident.  This sucker is HUGE!  We are talking multiple spots of vinyl touching tape in all sorts of improper spots.  This is when you put on your big girl panties...or big boy panti..no...boxers?  Whatever.  This means business!

Or, just take the easy way out like me and just cut the bubble out.  Yep.  That is it.  You do need to make sure to only cut the surface of the tape, and not run your blade deep into the design.

But it is totally possible.  There, cut open.

Now just put one flap back down, layer any excess flapage on top of that...

Aaaaaaand, there you have it.  Totally useable.  No problem.  I am sure you can come up with much worse bubbles if you tried, but these were all simply natural disasters resulting from a partially distracted vinylist.  Me.  I am not know for being the most precise, but I have figured out how to fix things when I mess them up.  

Novelty Print Quilt Pattern

I have had a hard time finding good quilt patterns for novelty prints the past couple times I purchased them.  I made up this pattern so tha...