Tuesday, August 18, 2015

Ahhh! Wedded Bliss

Well here it is, my post bursting with photos from the wedding last month.  The happy couple are home from their honeymoon in Europe and life has started to feel normal again.  What better time to look back and remember just how gorgeous everything was that day.  

The wedding took place at the Basilica of Saint Mary in Minneapolis, MN.  With all the running around on the day of the wedding, I didn't even get a picture of the Basilica.  I had to borrow this one from the library of congress ;0}

This church is just breathtaking.  It was built between 1907-1915 and was listed in the National Register of Historic Places in 1975.  I guess this month would be it's 100th birthday as the Basilica of Saint Mary was dedicated on August 15, 1915.

And my little brother was married there the month before ;0}

A while back I posted on all the options for flower girl dresses.  We went with all white, crochet topped white tulle tutu dresses.  I lined the crochet part with t-shirt fabric, the skirts with a satin slip, and added a cap sleeve so that the dresses would stay on during the LOoooong walk to the altar.


Eli looks just thrilled to be escorting the two Jr. bridesmaids, doesn't he?


Flower girls...then the boys...then.....

The bride!  Davie, my new sister-in-law looked absolutely breathtaking walking down the isle escorted by her parents.

David was pretty excited to see her ;0}

He does, she does,
Now kiss the bride cause it's time to party!

My three kiddos.  Madison, this is what you get for making faces when I am trying to take pictures.


So, I was not ever familiar with the idea of a "Grand March" until we moved here to MN.  So once everyone is seated at the reception and happy hour is over, there is a big announcement, then the wedding party comes in the room one by one.  Each set of attendants does something goofy or cool or dances all crazy, then the next set comes in until you get to the bride and groom.

First enter my children...They take after their father's side.  Actually, it is pretty obvious that my terrible genes have dominated on this wedding day, LOL.


All kidding aside, the reception was so nice.  The wedding party all took turns toasting the couple.


I had to slide a picture of the Grandma's in there.  It didn't even turn out clearly and they still look so cute!

Alright.  This is a craft blog.  Let's get down to the particulars here!

Davie's theme was peacock feathers using purple, green and gold as the colors.

You can see the cute table numbers she made here, along with the centerpieces.  


There was a candy bar.  My contribution was the kiss labels and the Love is Sweet sign.  The silhouette cut file for that sign is HERE in my dropbox if anyone wants it.


The gift table.  Davie made the birdcage card holder.  You can't see my "And they lived Happily Ever After" sign, but HERE is the cut file for that too.

Here is the cake that Davie picked out.  The reception was at Plymouth Creek Center in Plymouth, MN.  It was a very nice venue, but you have to have a licensed baker make your wedding cake.  I looked into becoming that licensed baker, but I had to have a commercial kitchen totally separate from the family kitchen to cook the cakes in.  

We finally decided to make a fake-cake for the reception, and Davie chose cheesecakes from Costco to be the cake we served.


With the two cakes I made for the grooms dinner the day before, I didn't get to start this cake until 10pm the night before the wedding.  I worked through the night making all of the flowers and managed to slip into bed about 5:30am on the day of the wedding.  It was all worth it to see the cake come together so beautifully and see Davie happy with how it turned out.

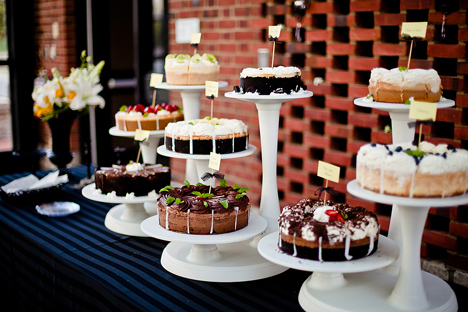
I made the labels for the sauce bottles and a few extra flowers to put on the cheesecakes.  I talked a bit a while ago about trying to figure out how to display the cake and the cheesecakes.  My wonderful neighbor gave me this cake stand and it turned out to be just perfect for the Costco-sized cheesecakes. 

There is really no way I could show you the stuff made for the wedding and not show you this crazy thing.  I blame David.  He saw this idea and was just obsessed with it.  This was the board that housed all of the seating assignments.  They blew up a colored photo and a sepia toned photo of the same picture.  

It is kind of hard to see...but there is one name tag still on there...

See?  I cut the names out of vinyl on my silhouette.  One Sunday afternoon David and every man in Davie's family plus Scott and Eli helped David work on cutting the pictures/foam core pieces apart while the ladies put the vinyl names on.  Later table numbers were added to the backs of the pieces.
Here is that big picture again...
Can you see the three name tags still on there now?
So when everyone came, this board was covered with sepia colored tiles.  Slowly the tiles were taken away and this was what was left.  Pretty cool, but SO MUCH WORK!  Seriously.  David and a large number of people worked more than 40 hours on this thing.  It was amazing though, so I guess it was worth it ;0}

The dinner was served buffet style in the next room.  That was the best wedding food I have had in a very long time!  I will have to find out the name of their caterer.  They were excellent.

Emmalee got a kick out of all of the photo props.  They had a photo booth service come halfway through the reception with a nice backdrop and filmstrip styled photo cards.  


Davie sent me a couple pins she wanted made for the wedding.  This was one of them.  It was a large window in the pin, but we wanted to use a frame instead, hoping it would fit better into their house after the wedding was all over.

These anniversary wine bottles were another thing she really wanted.  I made the bottle labels, she brought the bottles.  The idea was, near the sign-in book, people could write their wedding wishes for the couple and slip them into the wine bottles.  On the specified anniversary, David and Davie can open the bottle and read the messages left for them on their wedding day.  So cute.

I made this little sign to go on the table.  You can get the cut file HERE.  Or, if you don't have a vinyl cutter, email me and I can hook you up through my Etsy site.

This sign can be found HERE.  You will have to change the dates though ;0}
I believe the font is Great Vibes.  I love that font.  I used it for the last two weddings and it was perfect even with the different styles.

There was dancing after dinner.  David and his mommy.  I can't really handle the idea of this being me and Eli one day.


But this, Scott dancing with Emmalee, too cute!  The only thing sweeter to me that night was Eli dancing with Emmalee.

You can see here the colors we put in the train of the dress.  After the ceremony, Emmalee made me cut the tulle shorter so she could run around and not trip, otherwise her dress had a bit of a train in the back that drug behind when she walked.  It was gorgeous for the wedding, but having it shorter was a must for the party.


Toward the end of the night, the Dave's and I snuck away for a couple quiet shots.  What a beautiful, happy, perfectly blissful day for these two.


Even with all that commotion going on, they were really all about each other.  


Happy One month anniversary you two!  Davie, welcome to the family.  
We are so glad to add you to our crazy nut factory ;0}

Thursday, August 6, 2015

Groom's Dinner

Here are a couple pics of the Grooms Dinner we had the night before the wedding.  
It was 90-something degrees, 110% humidity, so the cakes weren't the only things melting in the heat.

Even with the extreme heat, those cakes held together like champs and were lovely to serve to the bride and groom.

The reception hall my brother David and his bride Davie had signed with do not allow non-licensed bakers/caterers, so that meant I could not make his wedding cake.  Well, the Groom's Dinner was my way around that.  My baby brother would get his cake one way or another.  I made this groom's cake just for him.  I used all the same recipes used for his graduation cake, but made a whole lot more.

This sucker was HEAVY!  I had to have Scott carry it out to the table, and by some miracle, he didn't drop it.  After about 20 min in that heat and sun the cake started to droop a little, but a little slip of a plate under the one side and it managed to stand for the rest of the dinner...until we cut into it...and then it was gone ;0}

The cake topper I made with my silhouette and a cereal box and some black vinyl, and about 2.5 hours at 3am.  Details, details.

I forgot to get photos of the picture frame centerpieces, so look close at this picture until I can dig them out of the box to photograph ;0}  I painted the little peg people one night just for fun, the D&D was made for the bridal shower I still need to show you.  The whole "Nearly Weds" sign just had to happen.  How sweet is that.  I cut that out on my silhouette also.  You can get at the cut file HERE in my dropbox wedding file.
Madison and I decided to make this "naked" cake for our new family member Davie.  My new sister-in-law Davie is just so gorgeous this cake reminded us of her.  She is so pretty she doesn't need all the frosting to make her beautiful, she is just naturally sweet.

This cake was a french vanilla cake with a fresh berry white chocolate mousse filling.  Can I just say this was to die for?  Is that tooting my own horn?  I don't think it is because I did not invent these recipes, just made them come all together on this day.  Man!  I wish we had a slice left over.  Yumm.

The flowers Mads and I crystallized the roses by brushing them with egg whites and dusting them with sugar.  They were left to dry for 48 hours before we used them on the cake.


Davie's family put together this cute wet bar and had the dinner catered by none other than Famous Dave's.  Duhh?  Who else would you have cater a dinner in honor of the "Dave and Davie" bridal party?  These two kill me.  They are so energetic and SO in love with each other.  

Everyone had a great time visiting and eating before the big day.  And yes, I am glad it is all over.  So special, so much work!


For half of the tables I made these centerpieces.  I took the couple's engagement photos, had them printed onto transparencies, and floated them in glass blocks full of water.  They turned out stunning.

I forgot to get pictures of the candy bars we made too.  I guess I have some work to do still.

Tomorrow I go into the hospital for a small surgery, so hopefully I will be back in business soon.  Until then, stay cool and I hope you have a fabulous weekend!

Tuesday, August 4, 2015

The Happy Couple

Well, the wedding is over, the guests are all gone.  We just got back from our week up North for a family reunion.  Everything was so beautiful.  My brother and his new bride are on the last few days of their honeymoon.  Here is a peek at the Happy Couple at the end of their fairytale wedding day.

All of these pictures were shot behind their wedding reception venue, Plymouth Creek Center in Plymouth Creek, MN.


These last couple are my favorites.  I just love that you can see the party going on in the background, but these two only see each other.  Best wishes Dave and Davie!  We call them Team Dave or "The Daves."  And Welcome to the family Davie!  

As for me, I have laundry and waiting orders oozing from every corner of my house at the moment, but as soon as I get caught up, more wedding photos and vacation photos will follow.  


Wednesday, July 8, 2015

How To Display...

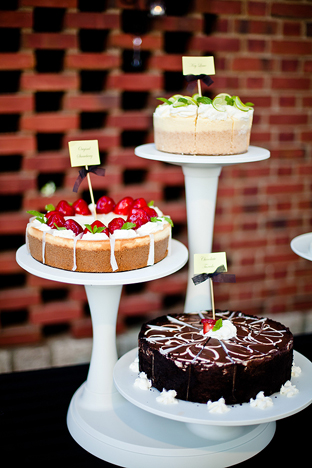
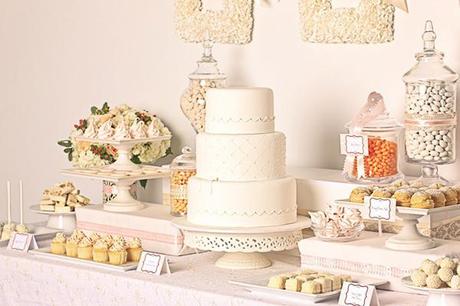
Down to the wire now, I needed ideas to show our bride a couple different ways to display her fake cake and cheesecakes at the reception.  Guess what???  I didn't find any pictures online!

It appears people do one cake, or cheesecakes, or just giant buffets of all different cakes and desserts.  So, I guess I will have to walk through this one pic at a time.

{source}   Available HERE from Wilton for $60

I love the look of this stand.  It is clean and simple.  I don't think it will work for us though because the cheesecakes are coming from Costco and are like 15-18" wide, all of them.  With this stand, the sizes get smaller as they go up.

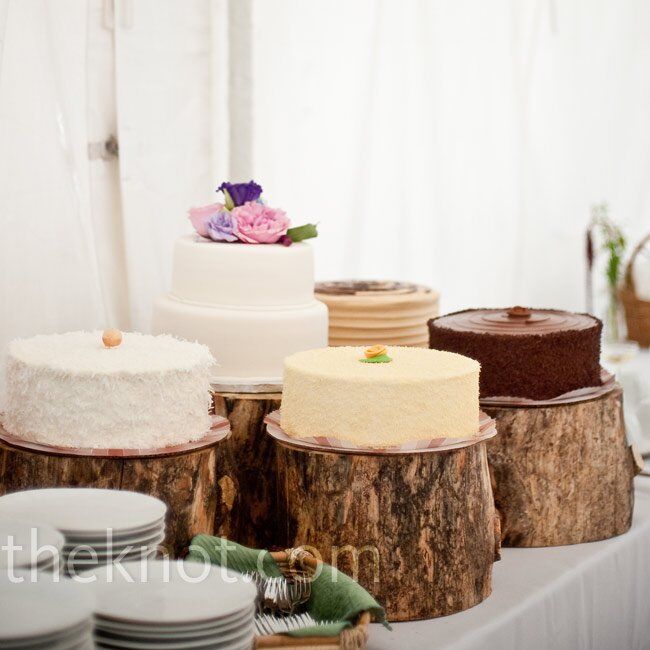
This one is cool.  It would work with cakes all the same size.  

I found it HERE for sale by Orson Gygi for $65.

0399cad0 dfd3 3585 8b85 2de842adb27a~rs 729
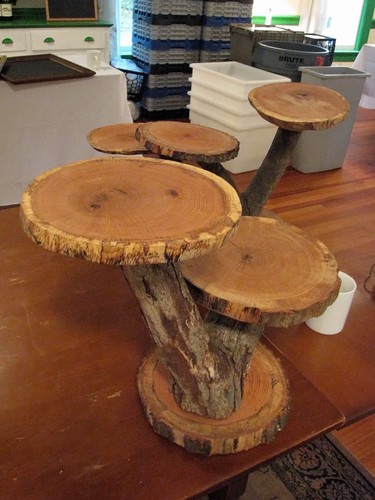
Stands like these, basically a cut log, can be purchased on Etsy, but if we went with these we would just make them.  Check out these other versions too...


Cupcake stands
How crazy is that one!?! 
It would be an amazing presentation I am sure.  It would be tricky to make that and make sure it is totally balanced I think.  Scott, my hubs would be in charge of that part ;0}

These displays are exactly what I have been wanting for slices of cheesecake or cookies.  Priced reasonable too!
{Image source}  Available from Wilton HERE for around $30
This is a low cost option, again varying sizes, but I think we could just use larger plates and make it work...maybe.  I would have to see it in person first.

Floating Tiers Cake Stand

Around $50 from Amazon

I love these!  They are gorgeous.  Orson Gygi also has a huge selection of this type of stand.

{Source}  Found online for $89
This particular site sells them as a 4 stand set, so to do this photo you would need to buy 2.

So, now that we have looked at stands, here are some "buffet" displays I found that might work with our cheesecake/fake cake setup.  You may have to use your imagination though.  Just take whatever deserts that are there and imagine cheesecakes instead ;0}


Beautiful!  A whole bunch of different crystal stands.  That would be perfect.

cake picture
I believe this display uses the clear acrylic stands.


I like the stair-step style of this display.  If I were them I would have done a square cake though, to go with all of the squares in the display.

Love the different heights.

Well, still undecided, but maybe one of these stands will catch my bride's eye.  If not, maybe it was a helpful collection for you.  More coming up on our wedding.  Less than 2 weeks and I will be able to show you what we decided ;0}

Friday, July 3, 2015

Just starting

I found myself with a day unassigned to someone else's project sooooo, I started remodeling this cabinet.  It has been living in my crowded garage for almost 2 years now.  At one point {pre-destroyed look} I put it on the curb, thinking it would be snatched up like back in Arizona.  Anything you put on the curb is gone the next day.  I guess Minnesotans are less scroungy cause after a couple days, and one terrible rain storm that knocked it over and soaked it in mud, I ended up pulling it back in the garage.  A while later there was a freak spray painting accident...and that brings us to today.  

I sanded it all over and started the up-cycle.  I nailed additional boards to the top {seen above} so that I had a base to nail crown molding to it.

Then I added this molding and ran out of molding AND time.  Dinner, running kids here and there, and all the while dreams of finishing this bugger have been swimming in my head.  Maybe tomorrow will be the day it gets finished being messed with and I can start to paint.  

Woot woot!  It is so great to do a little project just for me!
Stay tuned for the finished product...

Novelty Print Quilt Pattern

I have had a hard time finding good quilt patterns for novelty prints the past couple times I purchased them.  I made up this pattern so tha...