Tuesday, November 19, 2013

Random Acts of Craftiness

I had SO MUCH FUN on Saturday!!!  I got to go to my old home town of Marshall, Minnesota and help with their Super Saturday!

A couple weeks ago my friend Cindy messaged me on Facebook and asked what 15 ladies could possibly make for only $10.  The budget had been drained through the year and there was practically nothing left to fund Super Saturday this year.

I gave her a few ideas I had seen or had done myself, then basically invited myself to come bring a project of my own.  Etsy orders had been dominating my time so much lately, I needed to get away SO BADLY.  

I didn't actually decide on which project to take until the night before 
{go ahead.  Pretend to be surprised}

I had these two patterns I had been working on, and since I couldn't decide between the two of them...
I brought them both!  I decided not to cut apart the ornament, and not to use paper on the holly to try and simplify the projects.

Saturday Morning my girls and I hit the pavement for the three hour drive to Marshall.
About two and a half hours into the drive we came to the only stop light in our sweet little town of Granite Falls.  Right after Scott graduated from BYU we moved into the smallest little house here in Granite.  We lived here and loved the people with all of our hearts.  The worst part of our very brief visit was to realize that my little Eli was one when we moved here.  Madison turned 4 just a month after we moved in.  
Tears again.  
It is so sad to think back to those days and then realize how 
big my babies are now. 
 *sniff*sniff*

Scott worked here at Fagen in the Engineering department for 4 years.  Me and the kids would come to the office almost weekly with treats for all of his coworkers.  We loved them like family.   

I can't even explain how my heart felt when we drove through this part of the world again.  It had been YEARS since we were here last.  My mind was absolutely BLOWN at the thought of all that has happened to our little family between the day we left this small Minnesota town up until today.

I never could have imagined what was in store for us.

After one year of living in Granite Falls, we bought this sweet home in a town about 10 miles away, Hanely Falls.  The sight of that house brings a flood of tears...even a few stifled sobs.
  When we moved in back in 2003, it looked like a haunted house.  
The paint was cracked and peeling, the windows were falling apart.  
The walls were covered in plaster and the floors were about to fall in.

During the three long years we lived here we worked tirelessly to rebuild it from the inside out.  We knocked down all the plaster, tore out all the electrical and most of the plumbing...and then moved in.  The first year we made probably one room livable every two months or so.  I drove the school bus in the morning, then came home and painted or mudded drywall until it was time to drive bus again in the afternoon.

That tiny little window up high in the back of the house...We made that.  It used to be 5 foot windows there.  That is the only bathroom in the house, however it still worked great for our family since the bathroom was the size of a bedroom.  Just before we sealed up the old window spot we lifted a bathtub/shower enclosure through the space.  I have a picture somewhere.

So many friends from church or Scott's work came over and spent hours helping us with the overwhelming task of making that house our home.  I still can't believe we left it.  A month after Madison turned 8 we realized the Lord wanted us in Arizona.  Had we not left, we never would have had our sweet little Emmalee.  For that reason it was totally worth the move...it is still hard to think of all we gave up to go.

The great part of the story is, I got to go back this weekend and hug so many of my long missed friends.   That is enough of my sob story.  I though I had more pictures I could show you of what the inside looked like and all our helpers covered in drywall mud, but I guess they are on the other computer.  
One of these days I will get it hooked up and show you.

For now, let me tell you about the craft party!
This is Cindy.  I was her visiting teacher ten years ago :0}  Poor girl.
A visiting teacher is a calling in our church you can accept if you want.  You are given a few sisters in church and the assignment to stop by each lady's house once a month to share a spiritual message and see if they have any needs.  The fabulous thing about this program is that you become heartfelt friends,
 "bosom buddies" in the words of Anne.  
In all the places we have lived, I have accepted the offer to be a visiting teacher and to accept visiting teachers in my home.  It is those ladies that I visited and the ones who came by my home that I still keep in contact with even after all these years.  

Cindy did such a fabulous job planning her Super Saturday.  There were so many happy ladies there crafting, some experienced and some trying things for the very first time.  I love Super Saturday because it gives ANYONE the chance to get creative with plenty of help and support when things get stressful.

They made those decorative holiday cookie plates.  You use a clear glass plate, colored or not, either are fine.  Coat the back of the plate with mod podge.  Next, get a scrap of holiday fabric about 1-2 inches bigger than the plate all around.  Lay the fabric over the back of the plate, right side toward the plate.  Smooth it down with your fingers so that the fabric is totally on the back of the plate.  Once you have worked any bubbles out, coat the fabric with another coat of mod podge.  Check again that there are no bubbles, then place to the side to dry, preferably on a can or cup, something to keep the plate off the table so you minimize mess and let the fabric dry in complete contact at the edges.  Once the glue has dried, trim the excess fabric from around the edge of the plate using scissors.  Then you are done!  Put cookies or treats on the plate and deliver to all your friends and neighbors.  As long as you hand wash the plate, careful not to get the bottom too wet, the fabric will stay adhered to the plate.  If you don't' want the fabric on the plate any more or have too many bubbles to feel good about, just soak the plate in water.  The fabric will come off and you can start again. 

This craft was a big hit.  I think I remember doing this back when I lived here in Minnesota last time.
Good ideas are always good ideas!

Next was the Glitter and Pledge craft.  Cindy found tons of jars, glasses, and glass bulbs for us to chose from.  So, with this craft, squirt a little bit of the Pledge floor cleaner into the bulb or vase, etc.  Roll the liquid around inside until you have covered the whole thing inside.  Don't shake it though, cause you will get bubbles inside.  Once you have a nice coat inside the glass, pour the excess back into the bottle.  Now pour some glitter inside and roll that around until the inside is coated in glitter.  Pour the excess glitter out of the glass and let it dry.

That is it!

Cindy had all these cute stickers and gems to decorate the outside of the ornaments.  

I am beginning to think Cindy must have funded this whole Super Saturday herself!

Isn't that cute!?!

Here is another one.  This looks like it would be a fun kid craft at Thanksgiving. 
Don't ya think?

Makes me want to go pick up some Pledge floor cleaner!

These cute reindeer gift bags were also a project.  I love felt crafts.  I will have to ask Cindy where she found this pattern.  It is adorable.

These fleece mittens were another project the ladies could do.  I searched online and cannot find the pattern they used.  It was unlike any I found.  Essentially, it was one piece per mitten.  Cindy????
Totally cute anyway.  One sweet mom embroidered her child's name on the cuff after her mittens were sewn.  
The last project was what I brought.  I can't even tell you how long I agonized over what to bring.  I wanted it to be easy to cut, easy to paint, and adorable when finished.
Regardless of whether I succeeded at that or not, the ladies seemed to enjoy the woodcrafts.

I love the little dots added to this one by one of the kids.

Of course I didn't even think of taking pictures until the last five minutes.  Here was a holly woodcraft someone had painted.  

I also brought my fabulous glass ornament...
for the ladies to make.  I still have some left for sale on my etsy
 if you want to get some made this year *wink*wink*

Just so you know, we also had celebrities at our Super Saturday.  Shrek made a guest appearance.

OK, maybe not, but I always love it when I can talk Lindsey into joining me at craft parties :0} 
She thinks it is cause I want to see her.... ;0}
Take one look at this beautiful boy and tell me you don't want to just snuggle him.  You should hear him talk.  My whole family goes through withdrawals of Lindsey's cute kids between visits.

I did sneak the supplies to make this little guy through security so that Lindsey could make him in her down time.  We live like 4 hours away from each other now that I moved to the Twin Cities so I have to squeeze in her craft therapy any chance I can get!  Now to just find time to make mine!

So, once roadside assistance made it to the church to unlock my car {containing my car keys}, Lindsey followed us up to Holmberg Orchard in Vesta, MN.  My kids LOVED this place when we lived here.  In fact, Madison had something else planned for her Saturday, but once she heard we would be making a stop at the orchard, she changed her plans and came with me.

Here's one!  A coveted, long awaited caramel apple!

Aaaaaannnnd, Gone!  Yep.  We had made it just down the lane and she had it devoured.  
Yumm!  They use honeycrisp apples.  To-Die-For!

Finally, at about 5pm, we started our long trek back home via Mankato, Minnesota so we could pit-stop at Hobby Lobby.

What a fun day.  Seriously.  Best day ever.  We have been having a lot of those here between family and old friends.  Thanksgiving or not, I am just so grateful.

Friday, November 15, 2013

Loven' The Ribbon Retreat!!!

Any idea what this is????
Let me tell you!  A few years ago I was cruising around The Ribbon Retreat and noticed that they had hardware blanks for several things like headbands, barrettes and key fobs.  I started wondering if they might know of where to find the clips needed to make children's clip-on ties.  I had scoured the net trying to find them and had come up with NOTHING!!!  When you search for clip-on tie clip or hardware you get tie tacs.  I emailed and asked if they could help.  They kindly replied back with where to buy bow tie hardware.  After another email clarifying that I was looking for clip-on tie hardware...did they ever DELIVER!!!
Not only did they find the hardware, but they began offering it on their site.

Neck Tie Tutorial - Instructions on how to make your own pattern! {The Ribbon Retreat Blog}
So when you decide to make every boy in your family, your sister's family, and your dog a matching clip-on tie for christmas, you now know you can find this hardware at The Ribbon Retreat and for the low price of $.95 each!!!
Now that is a price to "Tie for"!!!
I know, too cheesy, but you know I can't resist the cheese!


I did a little tutorial of my own a while back on how to use the clip hardware and you can find it HERE!!!

Thursday, November 14, 2013

Just A Lil' Painting

I had a friend drop by tonight and had the chance to surprise her with a lil' bit of painting :0}  I love those kinds of surprises!

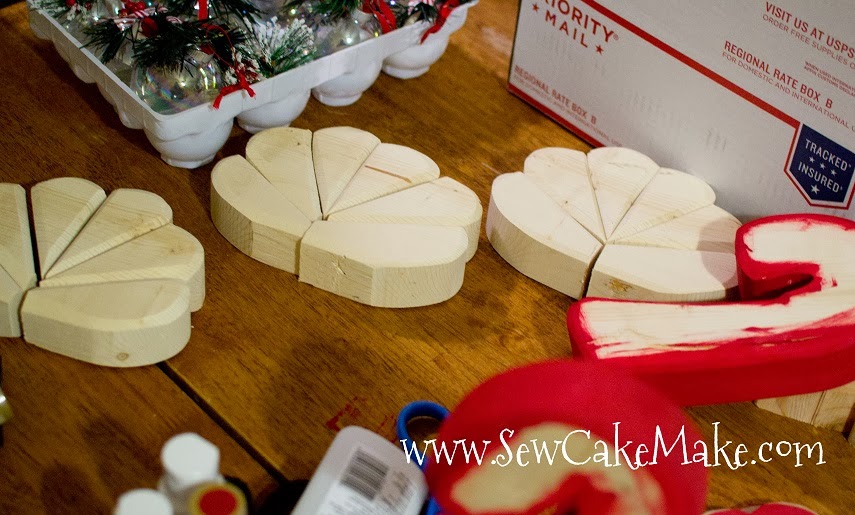
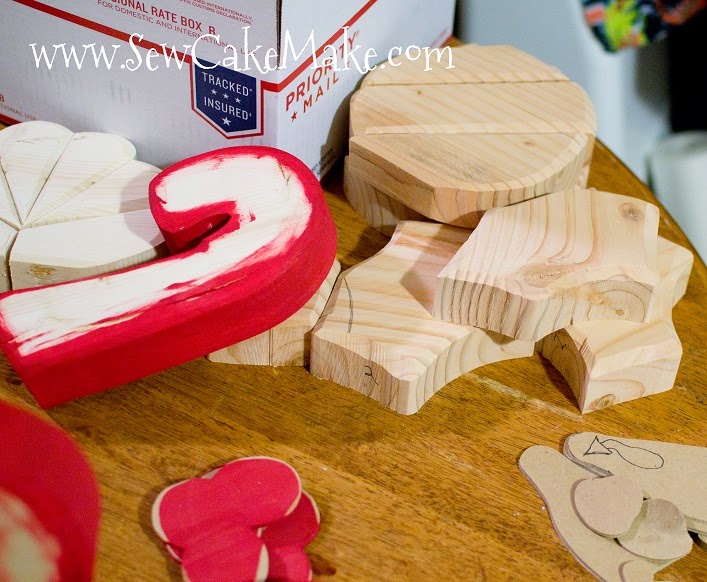
You see, I finally got up the nerve to brave the cold in my garage and cut some wood for a couple of orders I have waiting.  While I was out there, I managed to cut a couple other patterns I have been dying to try.

Please excuse the mess.  It is just me.  I am tired of trying to say its messy due to some thing or another.  It is just messy.  That is what it is like at my house.  How else are ya supposeda come up with crazy fun projects???  Mess it up!

I have the starters for some turkeys there.  After I took this picture I went ahead and painted the feather pieces all brown.  Where are these turkey feathers I am talking about?  Well, if you can't see them, you will just have to wait until I am finished painting the whole turkey ;0}

Then some candy canes, ornaments, and holly leaves.  Again, you will have to squint your eyes and crinkle up your nose to know what I am talking about...but one day you will see and you will understand.  

As for the only project on the table you can easily make out, here is my finished candy cane.  I cut the cute thing out, sanded the edges, then cut it all apart like a puzzle.  Once I had all my pieces, I sanded the edges again to give them that beveled kinda look, painted them, sanded them AGAIN, and then glued the whole thing back together.  Whew!  No wonder I am exhausted.  Just re-reading that makes my eyes ache.  

Sharon got to take a candy cane home when she left.  Hers was still wet, so she took it home on a cookie sheet :0}  It is kinda fitting cause painting this candy cane made me want to eat candy cane cookies!  Anyone have any candy cane cookies lying around you want to drop by?  I can exchange for a wooden version!  And while you are here, how about staying a bit for just a lil' painting???

Sassy Knits

I wanted to show you this little shop I found in one of the Minneapolis neighborhoods a while back.  I just realized I had the pictures sitting here and never got them posted :03

Sassy Knits happens to be situated across the street and down two shops from that fabulous sewing store I showed you a while back, SewTropolis, near 48th Street and Chicago Avenue in Minneapolis, Minnesota.

Their entire line of clothing is hand made in the shop!  Not only that, but it is entirely made of recycled knits.  My mind exploded with the thought of the possibilities.  I could actually take my old shirts, cut them up, and make a whole new piece of clothing!  It's like Sassy Knits gave me permission to get creative or something.  

 They have a full line of incredibly comfy clothes for women, as well as totally adorable childrens and infants clothes.  Sassy Knits' one-of-a-kind creations are available for purchase at their store, or at a number of swap meets and markets in the area.

I was totally stoked they let me take a peek in back to check out their creative space.  Big tables, sewing machines, and tons of work space.  You can see their serger in the back.  That big blue thing on the front table, the thing with the handle up in the air...I am gonna go out on a limb and guess that is their snap press.  I have one and I LoVE it!  We used it last weekend when we made our Kitchen Towels.  I even let the little kids use it, it is that easy to use.

Wait!  Can you say sidetracked!?!  Back to the shop...

Check out all those bins of knits!!!  Talk about making money while saving the planet.  I am in total awe at Sassy Knits and their resourceful upcycling of used knits into something unique, fabulous, and new.  I am ready to hit the thrift store all over again and find something unique to play with.  I guess I should probably start with my OWN closet, huh?  

Tuesday, November 12, 2013

Hangen' Around

I had several visitors come this past weekend!  It was especially thrilling since I got them all to sew with me ;0}  Check out the hanging hand towels we made!!!  

I have enjoyed my Halloween towels all last month and really dreaded taking them down after October ended.  Now, thanks to my visitors, I have some fall towels to hang up.

We made acorns, 

Fall Leaves, 

Pumpkins, 

And Turkeys.  Doesn't Mr. Turkey look cute with his little button nose???  We literally took an orange button, cut it with scissors until it looked like a beak, and stitched it onto the turkey.

We didn't have time to make the holly towels with the first group, but managed to make these cute towels with my second group of friends.  

Want to make some???  You can find out how to make your own from my tutorial for the Cupcake Towels.  I used the same method to make these new seasonal versions.  I have about a hundred other designs I want to make.  Now to find the time :0}

Monday, November 11, 2013

Game of Life Handout

My lesson this week for the girls at church was about the importance of gaining an education and learning all you can to prepare for the life in front of you.  When I was thinking about how to teach this principle, all I could think about was the game Life.  I HATE the game Life.  My kids LOvE to play that game, but for me, adding pretend student loans to my REAL student loans is not fun ;0}

Regardless, the game of Life is fun for kids, so I adapted my lesson so that we could play the game along with learning about life-long learning at the same time.

I wanted to make a little thought card that would remind the girls of the things we talked about.  After picking pieces apart in my mind, here is the Life game spinning wheel I came up with.

I took each piece of the wheel and made a silhouette cut file that corresponded to each color.  I have each cut file listed below available for free download from my Dropbox Folder.

First, I cut the green background with the Life-GreenBack file.  Then, I used the Life-Color file to cut one pie-like circle out of each of the 10 colors of vinyl used for the rainbow part of the wheel.  I recently purchase a variety pack of vinyl colors on Amazon and have LOvED having the selection lying around for times like this!

Lastly I cut the Life-White file to cut all the remaining pieces of the spinning wheel.  Once all the white pieces were cut out of cardstock, I stacked them up, inked all the edges, then glued the pieces in place.


TaDah!
A Life-like spinning wheel.

I printed out the thought cards and cut them apart, inking all the edges before reaching for the glue.

I just printed it on my home printer due to time, but really wish I had the time to have it printed up at Office Max.  The print is really so much sharper it is totally worth the hassle to have them printed.

The cut cards were glued to the front and I was ready to teach the lesson.  I thought for a while about putting the thought on the back, but I wanted the words visible from the front in hopes the lesson reminder would end up on a mirror or somewhere where it could be seen and remembered.

As far as the lesson played out like a game, I had the youngest girl in the room put the board together, the oldest was our banker.  One other girl was in charge of the cards.  We skipped any insurance or paying for lack of insurance.  I printed out the following prompt cards.  
Please note that my printer is on it's way out, and for some reason will not print a whole page :0}  I can usually get the first 2/3 of a page to print, so for these cards, they are only printed on 2/3 of the page {teehee}.  I just figured I would throw them on here so you can see what I used for the lesson part of a game turn.

So for game play, we divide the girls into two groups.  ***Please understand that you will not have time in a normal lesson schedule to finish if you have two teams.  My original plan was to have just one team and we would all be on the same team.  

Since the lesson was about getting an education, both teams went the education route and received their student loans.  When it was a team's turn, they would take a prompt card {the ones I made} and read them or the scripture listed on the card to the class.  For the scriptures, I asked them to read the verse{s} listed and then express in their own words what the scripture meant.  After that, the rest of the cards were quotes from an article I read and each is followed up by a question relating to the quote.

Once the card was read and question answered, or in other words, once their learning happened, they were allowed to progress through {the game of} life by spinning the wheel to determine the number of spaces they could advance.  For the sake of time {I was really trying to get through that game} each team actually went double the spaces rolled, still stopping their turn once they came to a stop sign on the board.  To make this clearer to you, If they spun a 6, they would move their car 6 spaces, do whatever it said to do on the space, then they went another six spaces and did whatever it said as well.

For the first half of the game, they pretty much came to a stop sign with every, to every other move.  Sorry if you have not played the game Life before.  If you haven't you are probably a bit confused about all my babbles.

Whatever event they landed on, they paid or collected the suggested funds, but they also had to name a blessing that might come from the listed event.  It was funny because one team landed on everything good, right up until they landed on "You had Twins!" anyway :0}  The other team had car crash after mishap pretty much the whole game.  Once, they spun the wheel and got a 10, but since the other team had the job of police officer{and the game states that if you are the police officer you collect $10,000 from anyone who rolls a 10 {gets caught speeding}}, and we were playing that you went twice on what you spun, the poor girls had to pay the $10,000 twice!

I passed out a "life" tile with each life experience after they listed what a blessing was for the given event.  Every once in a while the girls gave just amazingly insightful responses to the questions and were spontaneously awarded $5,000 for their fabulousness.  

Anyway, we got about half way through the cards and our time was up.  I drove the two cars together to the pearly gates at the end of the game and landed my huge bowl of Halloween candy smack in the middle of the game board.  I shared that even though we all have different circumstances in life, we all have the same reward for faithfully pulling through the good and the bad in life, thus every one got candy in the end.

This was a very successful lesson, I have to say.  I had more participation from my group of girls, and even adult leaders, than ever before.  We played, we talked and discussed, and really had a blast together.  

Let me know if you have any questions.  I would love to answer any you might have, otherwise, I am off to try once again to get some sleep.  I keep praying that this cold will go away and I can finally sleep through the night without a coughing fit forcing me out of bed.  I went to the doctor on Friday to get a prescription to help my symptoms, and they informed me I could not have an antibiotic for a sinus infection until I had suffered through it for 10 days.  Nice.  So, Tuesday I can finally go back to the doctor and get the medicine I need.  Looking forward to that!!!

Wednesday, November 6, 2013

Creating Stamps With Your Silhouette!!!

I just learned the craziest thing!  You can make your OWN stamps with your Silhouette!  I am shocked and so excited!

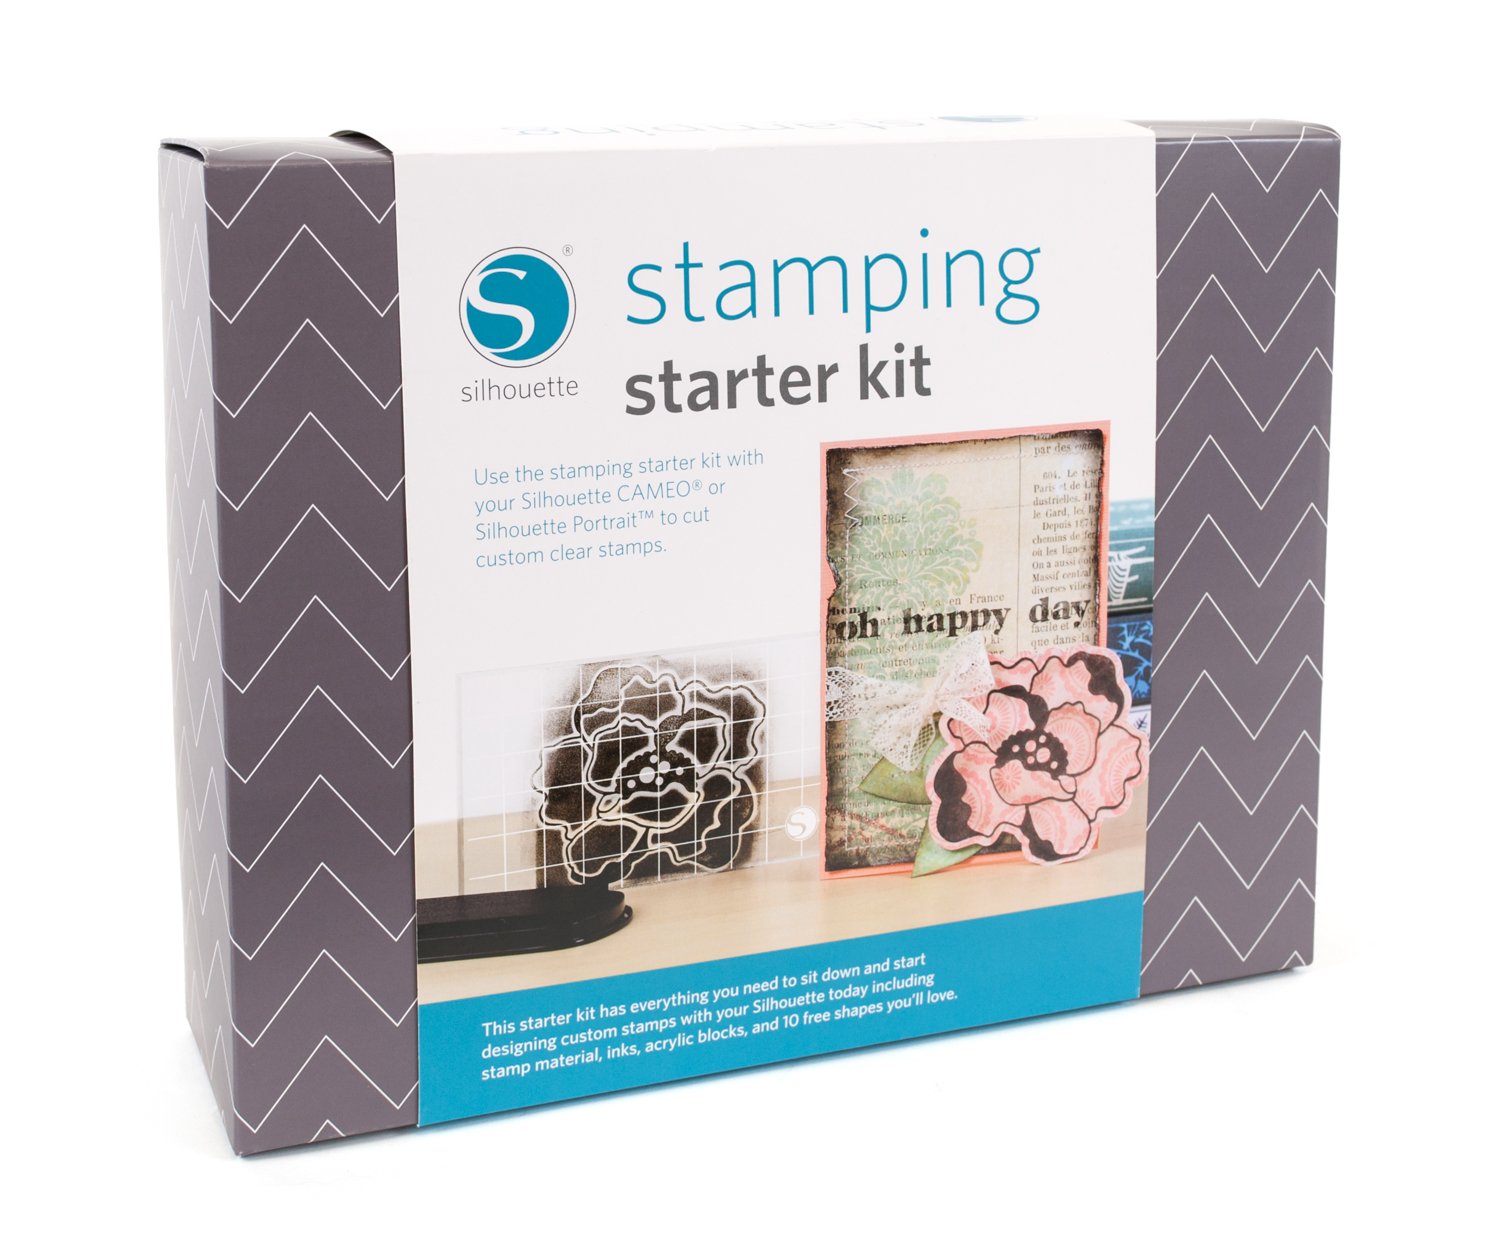
You will need to purchase one of these Stamping Starter Kit like this one I found at Amazon for $29.99 with free prime shipping.  

Now check this video out...


OK, first thing on my Christmas list so far ;0}

I am actually getting pretty excited to start scrapbooking again and this stamp kit would be perfect to make the little pieces I don't want to buy.  The kit comes with all of the following:

3 sheets of stamp material
  • Specially designed cutting mat for stamp material
  • 3 acrylic blocks in different sizes to fit your stamps
  • black ink pad
  • 10 exclusive stamping designs, instructional DVD, and idea book
Imagine all the projects you could do!!!  You could totally make coordinating images and just stamp them where you want them.  I love the offset feature that allows you to cut a piece of paper just larger than your stamped image, and with the clear blocks you can see right where to stamp.

"Oh Honey???  Mr. SewCakeMaaaaker?  Can you come here so I can show you something?  Pretty Please?"

Novelty Print Quilt Pattern

I have had a hard time finding good quilt patterns for novelty prints the past couple times I purchased them.  I made up this pattern so tha...